Sticker Dance Quickstart
If you have already finished installing and activating MCAStar, this guide shows the shortest path to complete a basic Sticker Dance livestream setup.
Prerequisites
This guide assumes you have already completed the steps in the Basic Guide.
Basic broadcast setup such as cameras and Live Studio is outside the scope of this page. Please consult TikTok for those topics.
Before You Begin
This page uses Sticker Dance as an example to introduce a standard workflow for first-time MCAStar use. Before you start, you should already have:
- MCAStar launched successfully and able to enter the main interface
- Confirmed which TikTok live room you will connect to for this broadcast
- Clarified which cast members are participating and how gifts should be assigned
- Prepared Live Studio or OBS for adding the MCA widget
Live Studio or OBS
Based on our experience, mounting the MCA widget in OBS first and then outputting the scene to Live Studio usually gives more stable operating conditions.
However, to keep this guide easier for new users, the steps below still use direct mounting in Live Studio as the example.
Security warning
Please obtain Live Studio and any Live Studio support only through official TikTok channels.
Language Switching
Click the gear-shaped button in the top-right corner of the MCAStar main window to switch the MCAStar language.
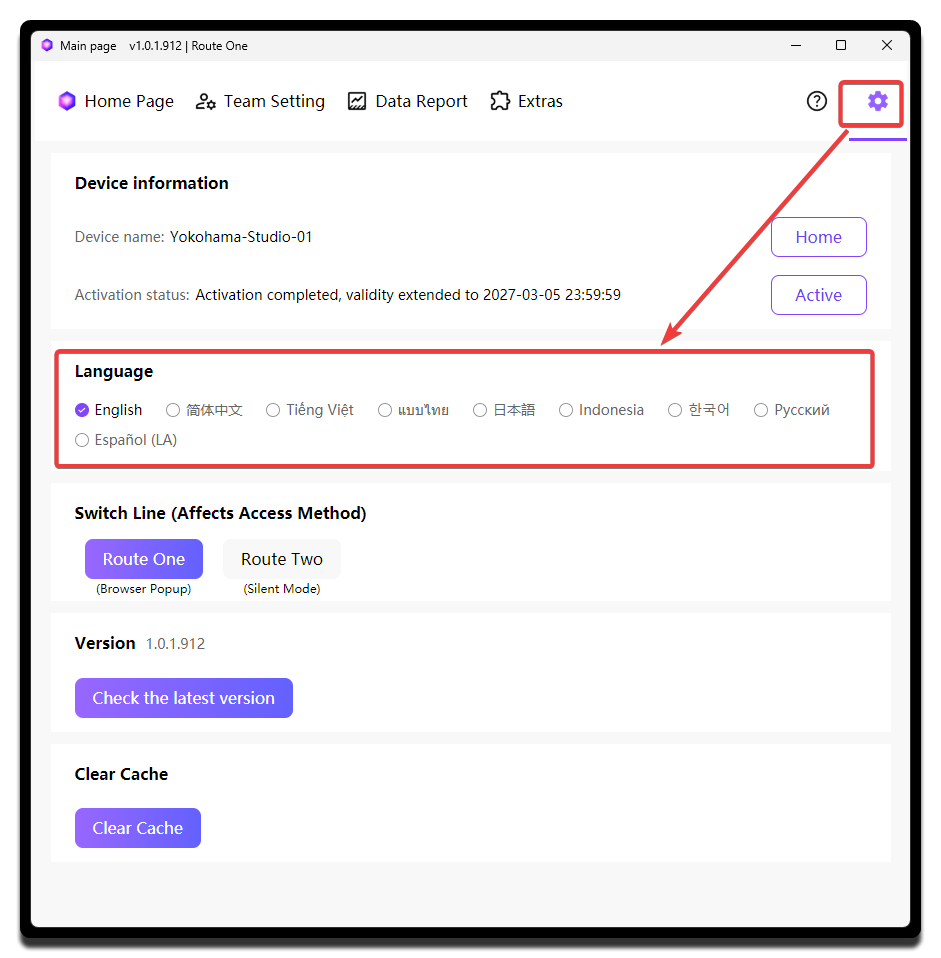
To make the instructions easier to follow for all language users, this document uses the English interface throughout.
Choose the Collection Line
Please refer to About Collection Lines.
Connect the Live Room
First, point MCAStar to the room you are about to broadcast from.
- At the bottom of the main screen, enter the TikTok username in
User name, or paste the live room link directly.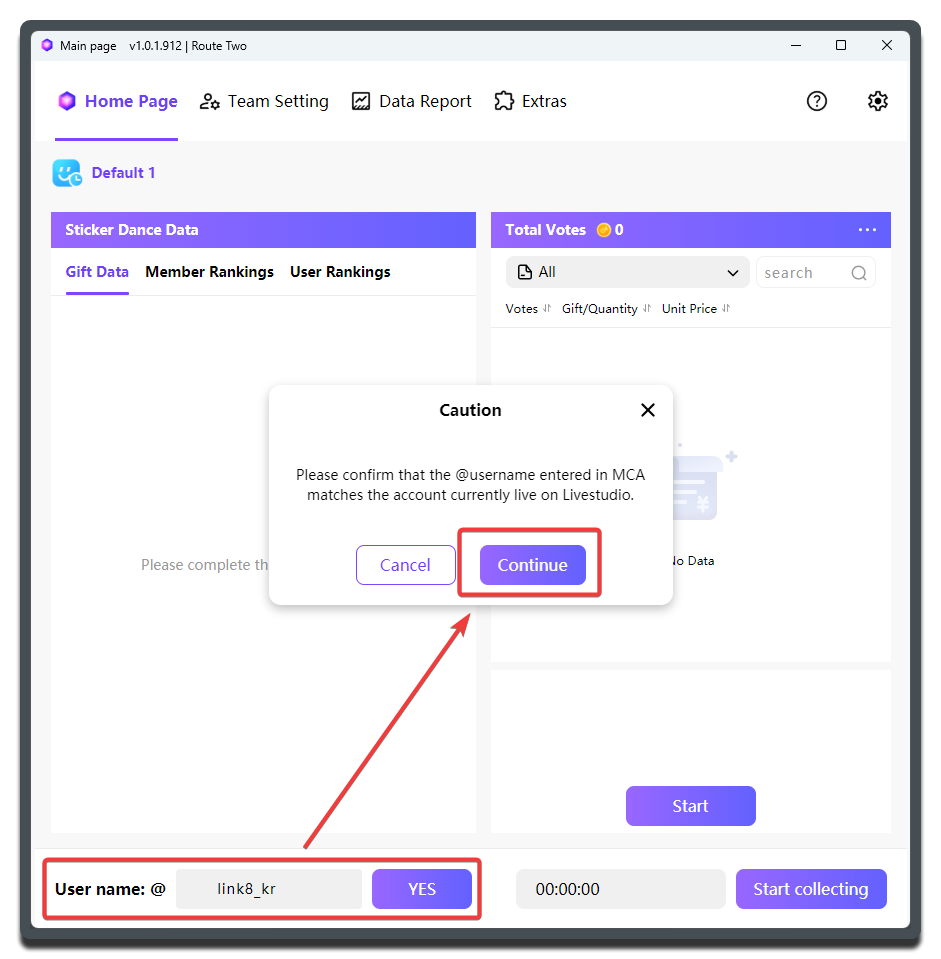
- In the popup window, verify the avatar, nickname, and room information, then click
YESif everything is correct.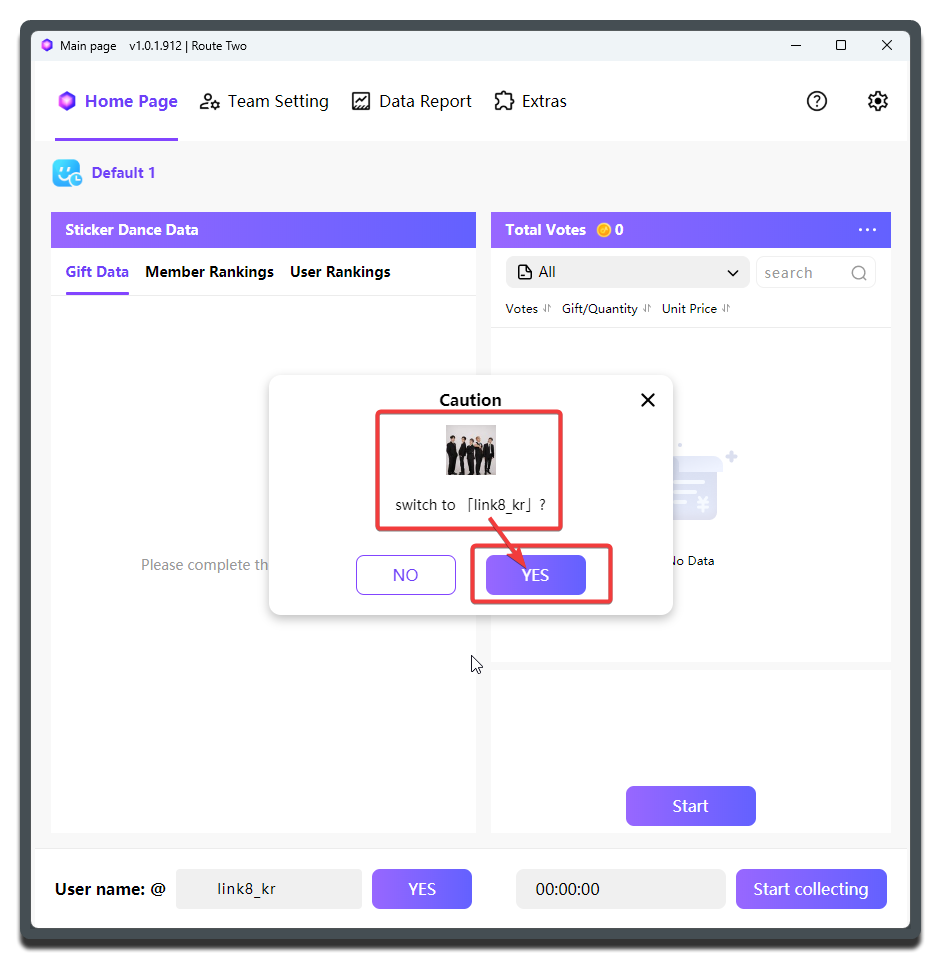
After that, if the room information on the main page has updated to the current live room, the connection was successful. The corresponding room preset will also be selected automatically.
Convenient room switching
All MCAStar mode presets are bound to live rooms, so after one group finishes broadcasting you can switch to another group very smoothly.
Create a Preset
The purpose of presets is to organize the settings needed for different livestream segments into one-click switching plans, so you do not have to adjust everything manually every time.
Because this is a quickstart guide, we will create a Sticker Dance preset in the simplest possible way.
- Choose
Team Settingfrom the top menu. Almost all setup work in this guide happens there. - Select
Default1. When you click an empty preset, MCAStar automatically creates a default preset for it.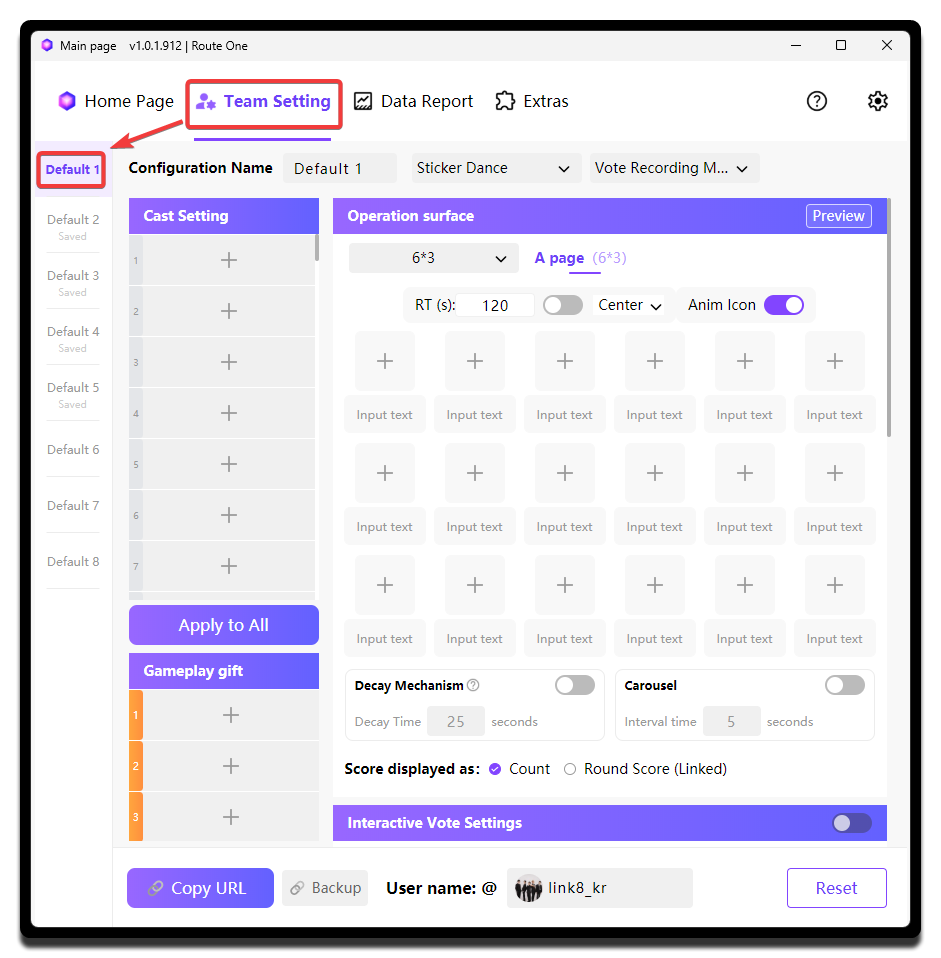
- Give the preset a recognizable name such as
Opening,Round 1 PK, orSettlement. In this document, we still call itPreset 1for simplicity. - Select
Vote Recording ModeunderSticker Danceas the mode for this preset.
Naming suggestion
We do not recommend names like Preset 1, Preset 2, or Preset 3 in actual operations. It is better to use the segment name directly so the operator can switch faster on site.
Configure Cast and Gifts
Continue the setup inside Preset 1.
The goal of this section is to let MCAStar know which cast members are in this broadcast and which representative gift belongs to each cast member. Later functions use that representative gift to determine which cast member should receive each gift assignment.
Add Members
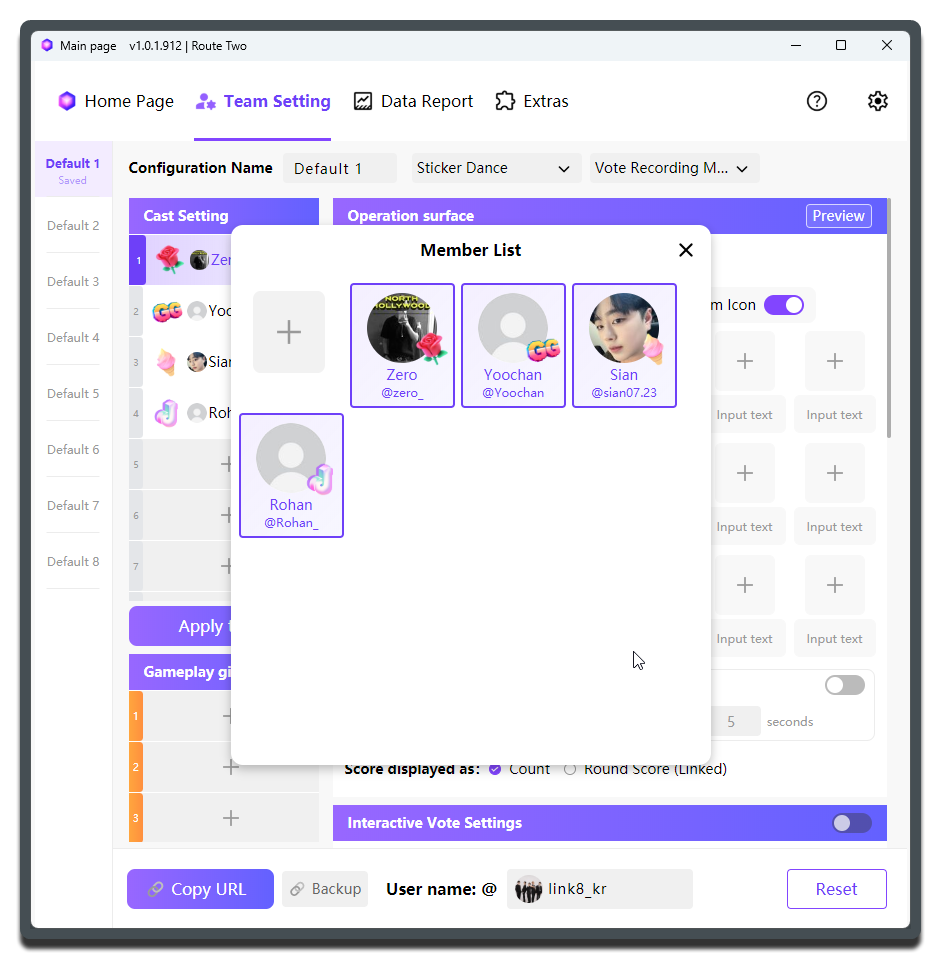
- In
Cast Setting, click+to open theMember Listwindow and add cast members.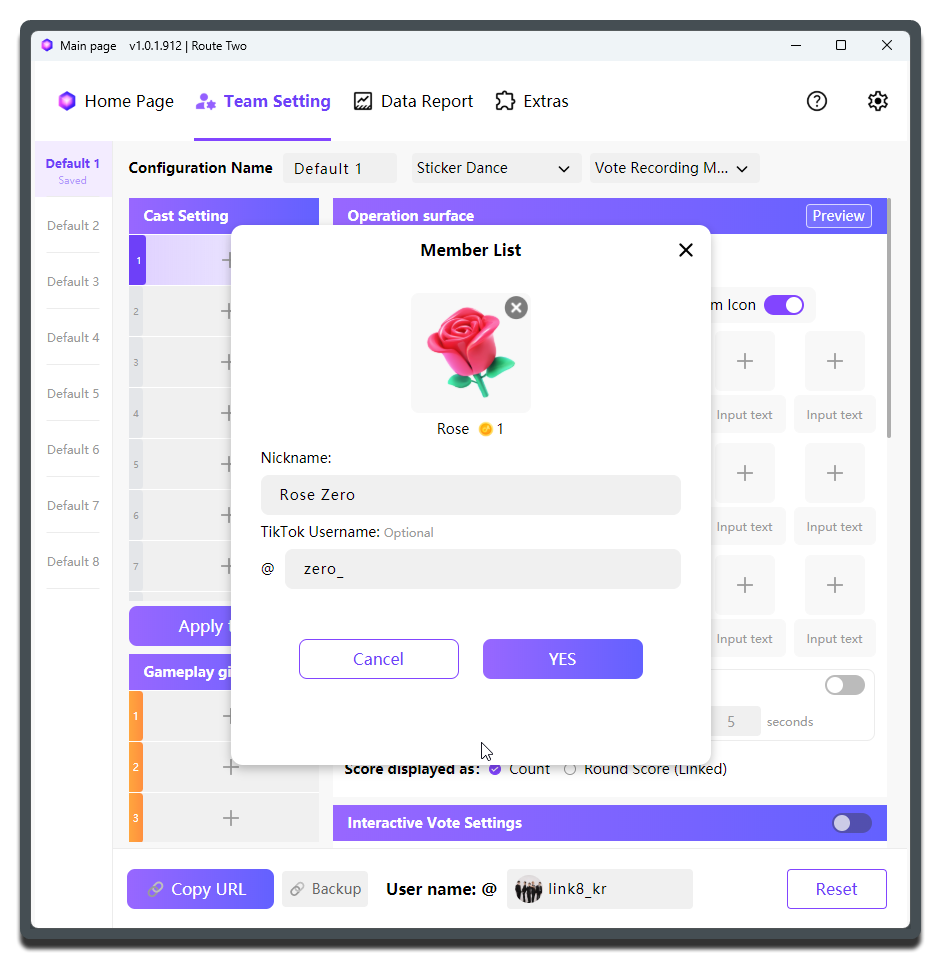
- Choose a representative gift (
exclusive gift) for the cast member. - Enter the cast member's nickname in the
Nicknametext box. - We recommend entering the cast member's TikTok ID in the
TikTok Usernametext box. MCAStar can then pull the avatar from TikTok automatically, making it easier for the MC to identify people during the livestream.
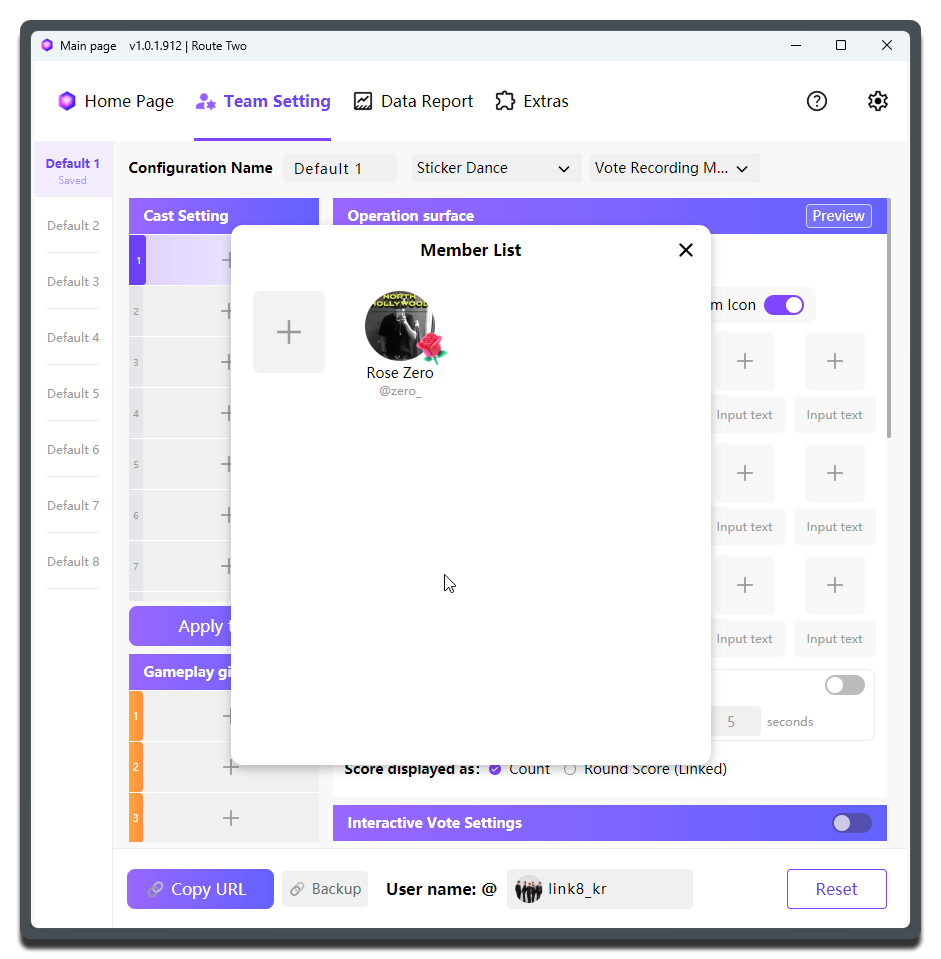
After adding one member, the result looks like this:
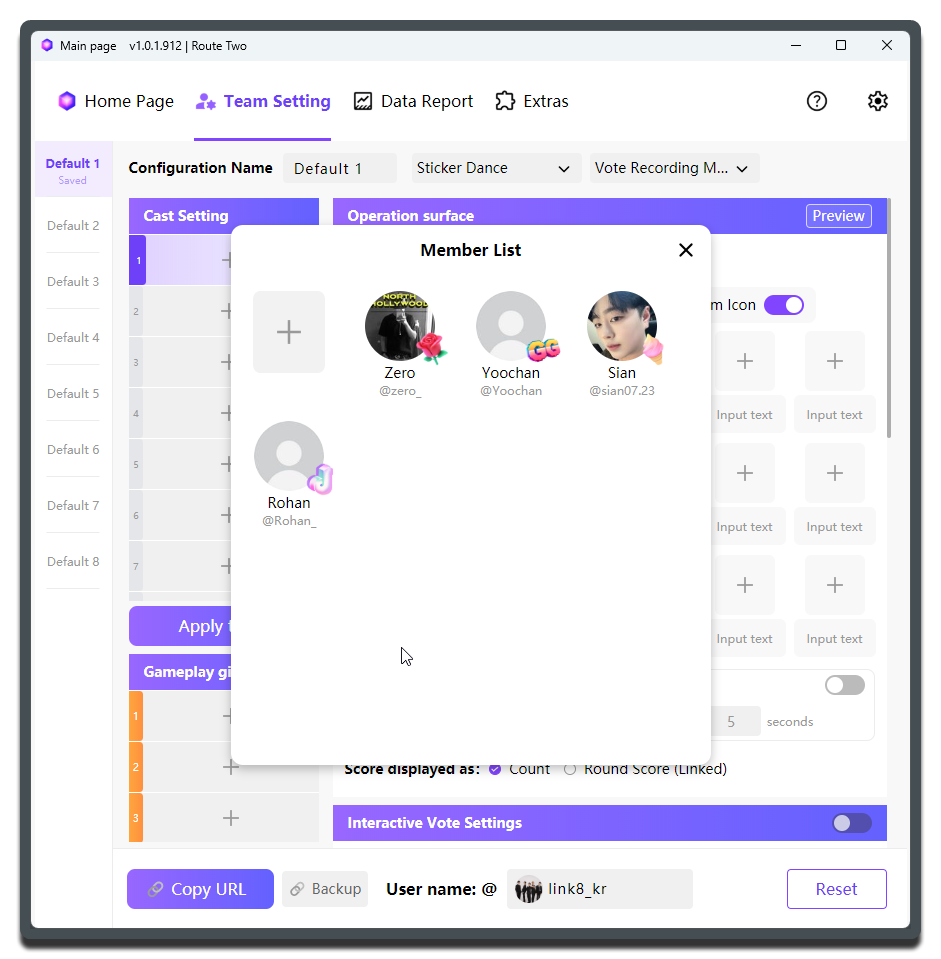
Then continue adding the other members:
About member management
Do not create the same member multiple times in Member List, such as James1 and James2. That makes future performance reporting much harder.
If one group must alternate between two devices (two live rooms) because of special operating needs, keep the Member List on both devices as consistent as possible so performance can still be tracked across devices.
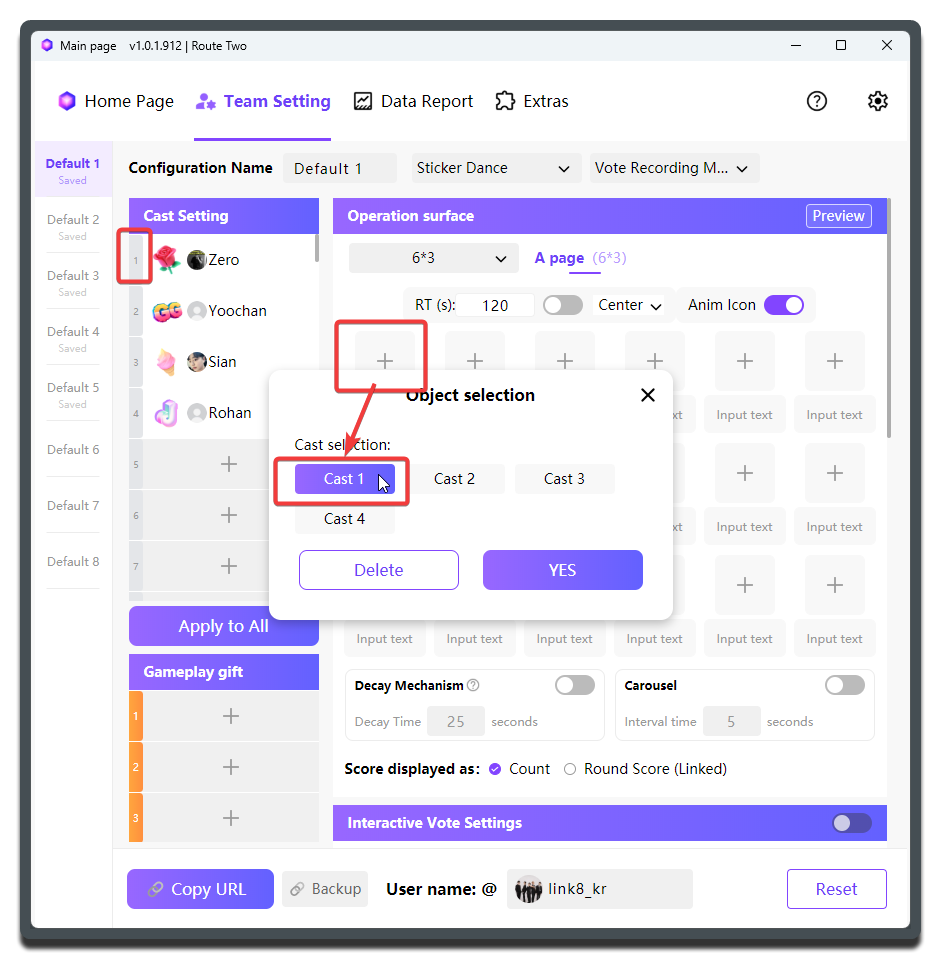
Add Members to the Preset
Members in Member List are shared across all presets. But for each preset, you still need to choose which members should be included in that preset's Cast Setting for the current livestream stage or staff arrangement.
After that, we recommend checking the cast list one by one to make sure every on-camera cast member has been added and every cast member has a gift binding.
Common issue
If a cast member is added without a gift binding, collection usually shows no score change or assigns gifts incorrectly.
If a cast member is added temporarily during the broadcast but not added to the configuration, reconciliation later is usually difficult, so it is better to finish the full setup before going live.
If you create more presets later, you can simply select existing members from Member List into Cast Setting without creating them again.
Sticker Dance Mode Settings
- The most basic setup is to add the cast members into the Sticker Dance matrix. Their representative gifts appear there automatically.
- Give each dance represented by a different gift sticker a short name, and enter it in the text box below the corresponding gift sticker.
- Above the sticker matrix, you can adjust the matrix size. This guide uses the most common layout:
6 x 3, which means 6 stickers per row and 3 rows in total.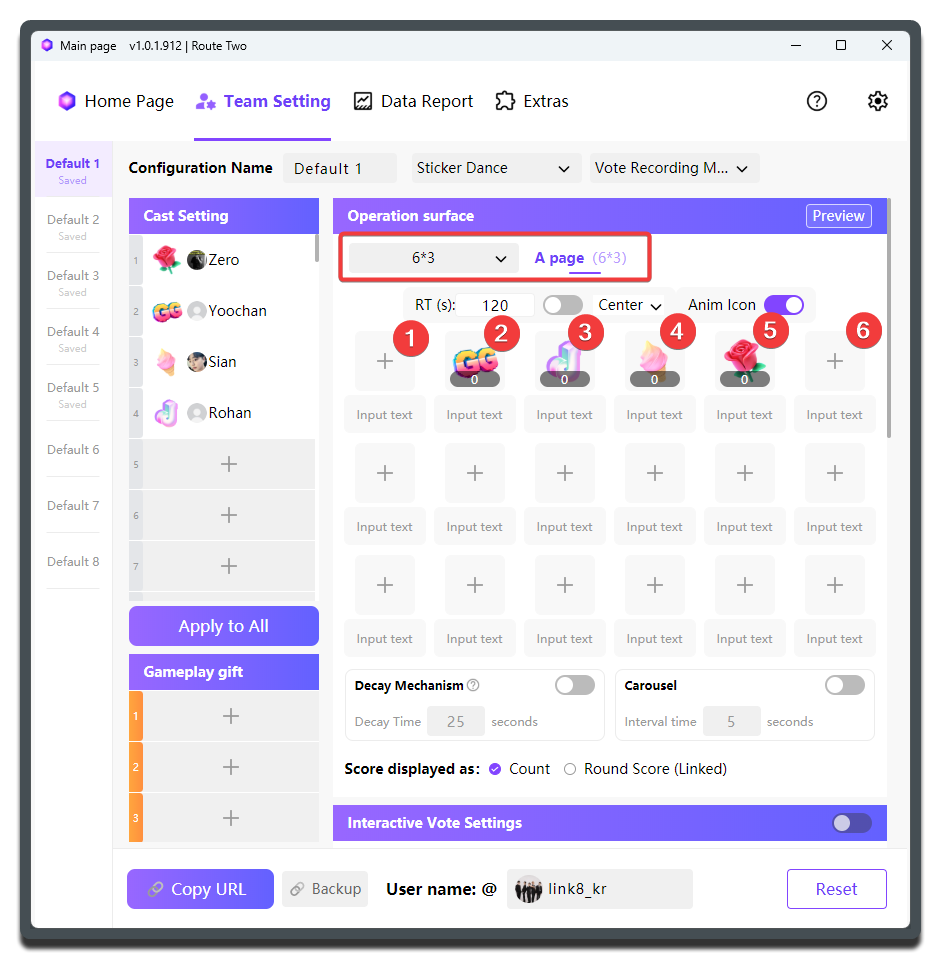
Yes, it is that simple. The most basic Sticker Dance preset is now ready.
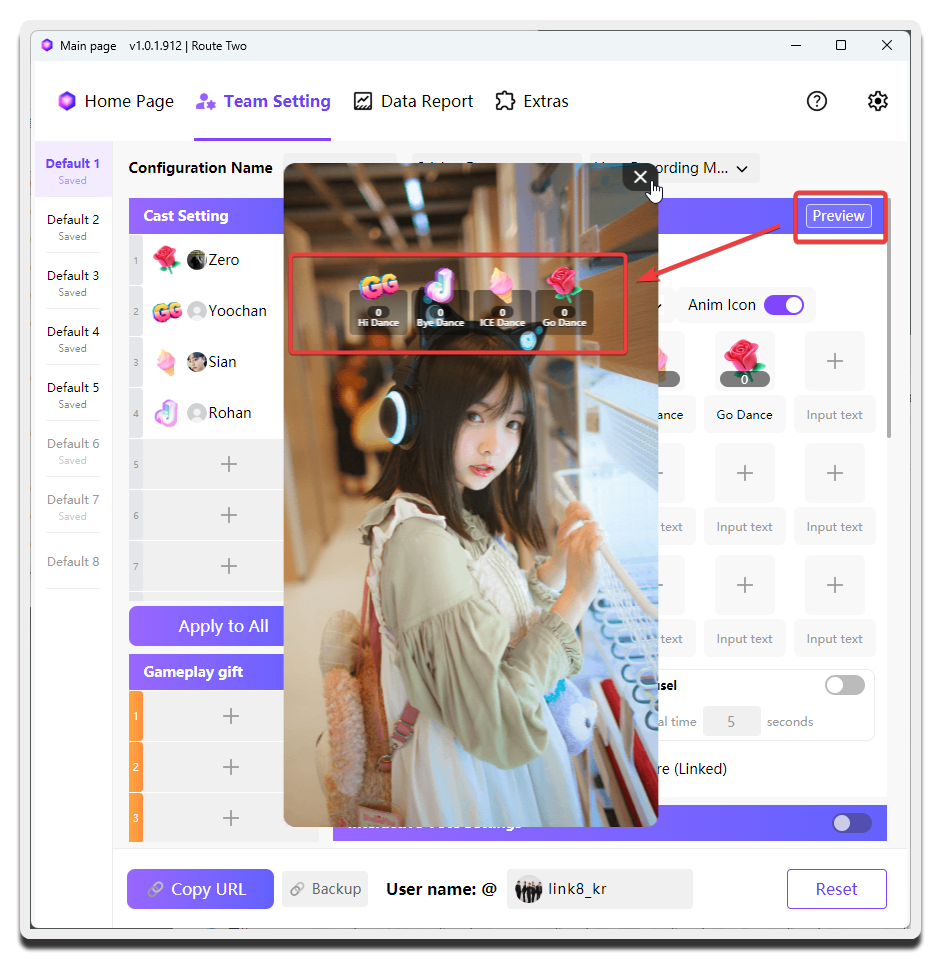
Center the stickers
Adjust the matrix size according to the number of cast members on stage so the layout stays visually centered.
Click Preview in the top-right corner to confirm how the configuration looks:
Add the Widget to Your Broadcast Tool
At this point MCAStar can already work normally, but you still need to configure your broadcast tool so viewers can see the MCA widget.
- Click
Copy URLin the lower-left corner.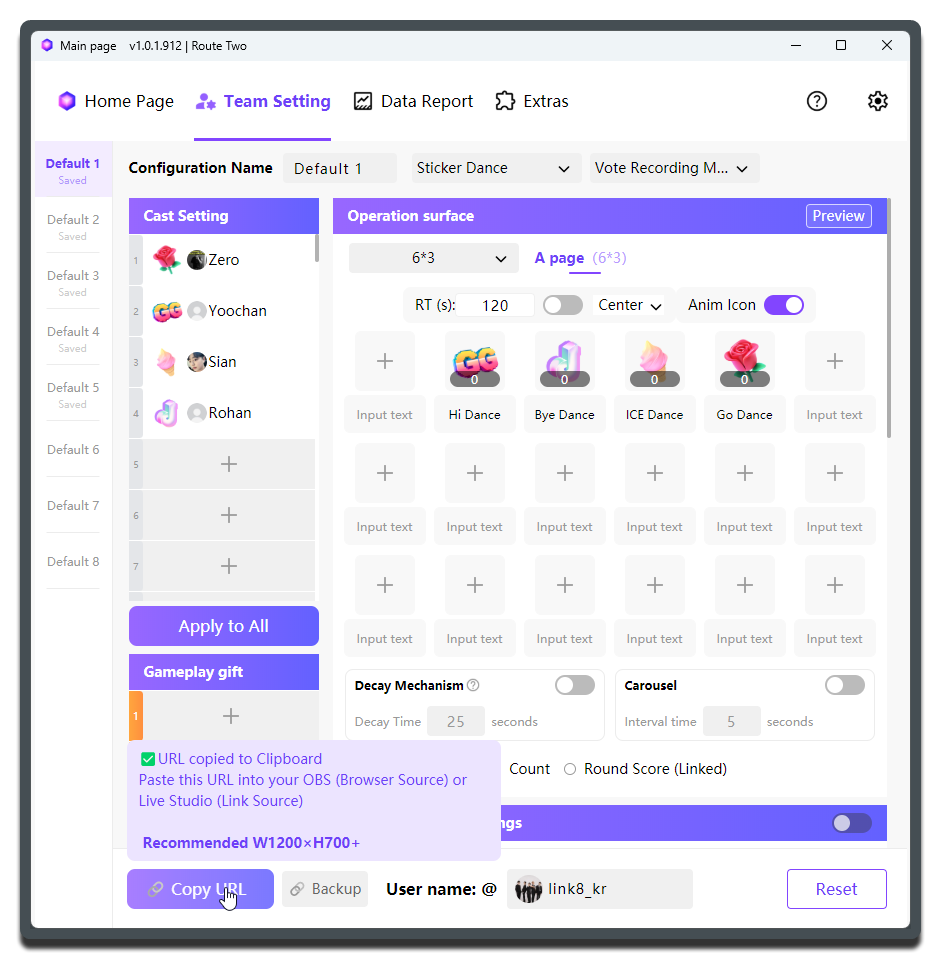
- We recommend reading the information shown after clicking
Copy URLand writing down the suggested widget size. In this example, the suggested size is1200wide by700high.
Add It in Live Studio
- Open Live Studio.
- Add a source of type
LinkorBrowser.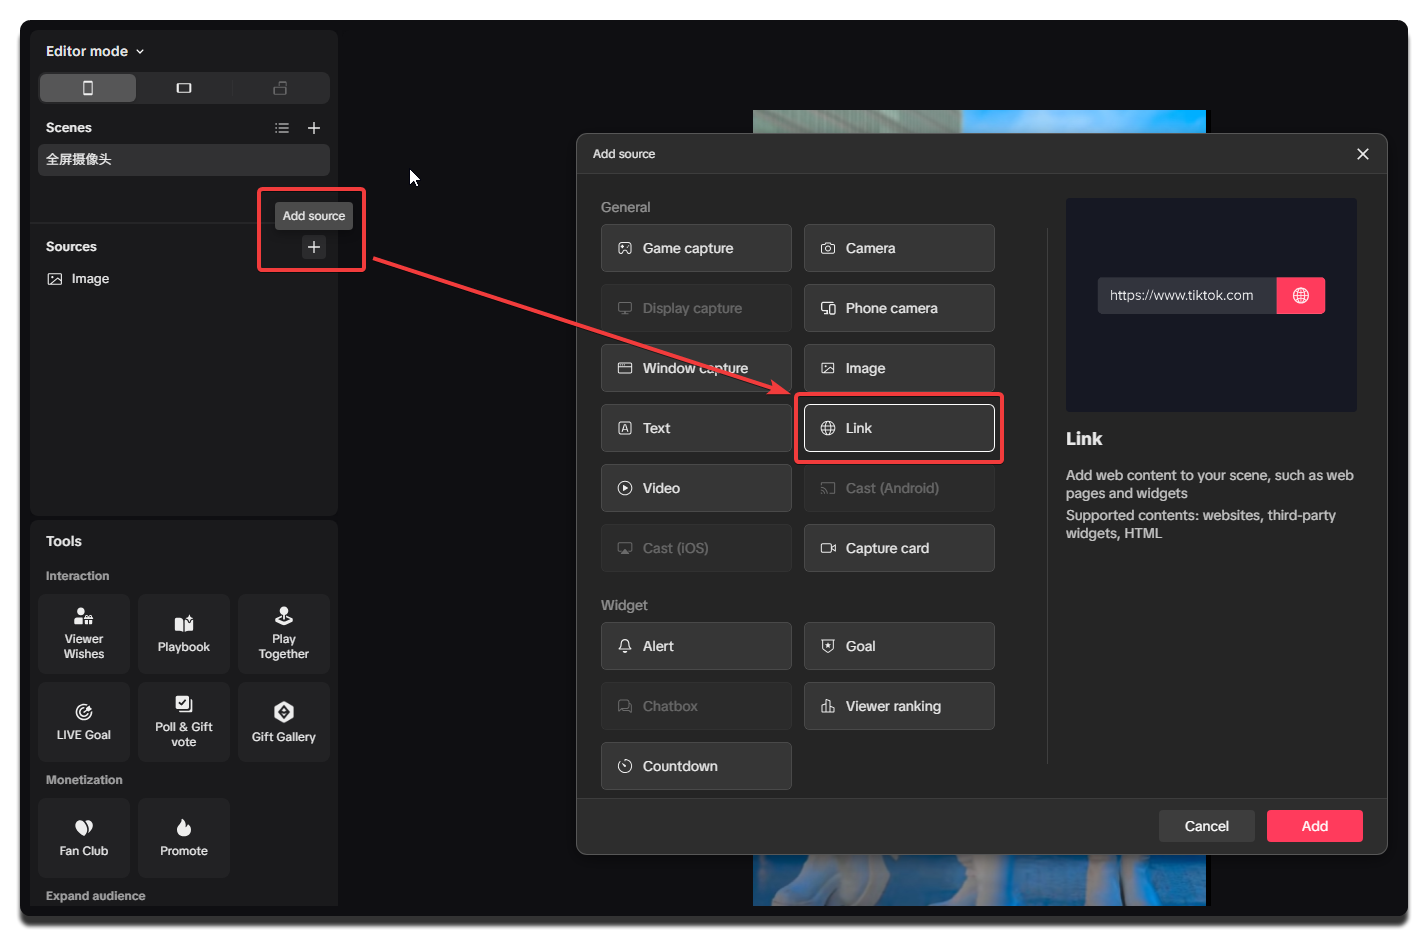
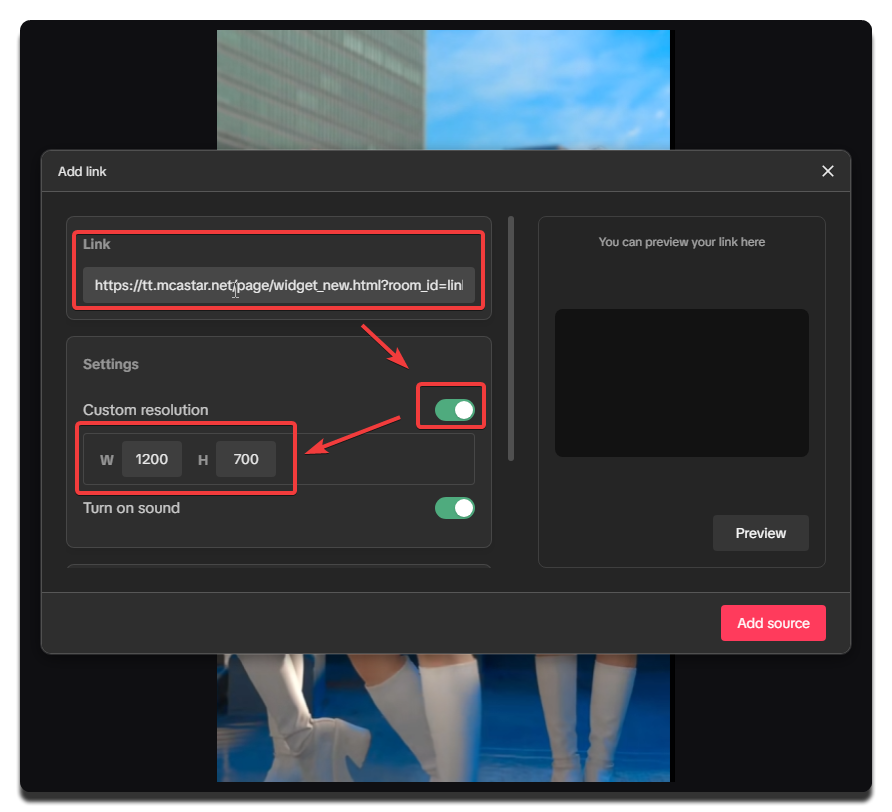
- Paste the widget URL and set the width and height.
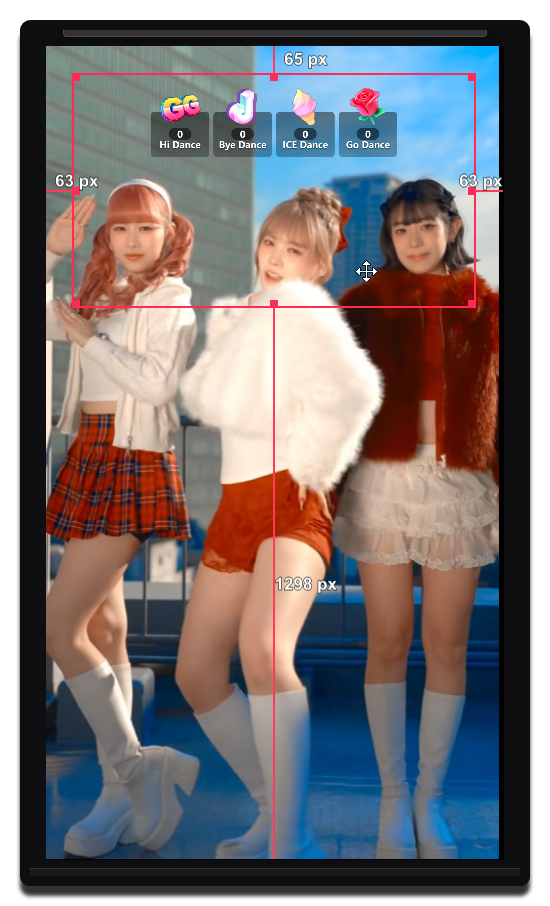
- Adjust the source position and layer order so it is not covered by other elements on screen.
Add It in OBS
The process is almost exactly the same as in Live Studio.
- Open OBS.
- Click the plus button in the
Sourcesarea, then chooseBrowser. - Paste the widget URL and set the width and height.
- Click confirm, then drag the browser source to an appropriate position.
Adjusting widget size
We recommend following the size suggested by MCAStar when you click Copy URL.
After copying the widget URL, do not edit the URL manually. If you need to change size or position, do it directly in OBS or Live Studio by dragging with the mouse.
Go Live
- Start the livestream in Live Studio.
- In the top menu of MCAStar, choose
Home Page. Most tasks during the actual livestream happen there. - In the preset selector on
Home Page, confirm that the current selection is thePreset 1you just created. In most cases it should already be selected by default. - On
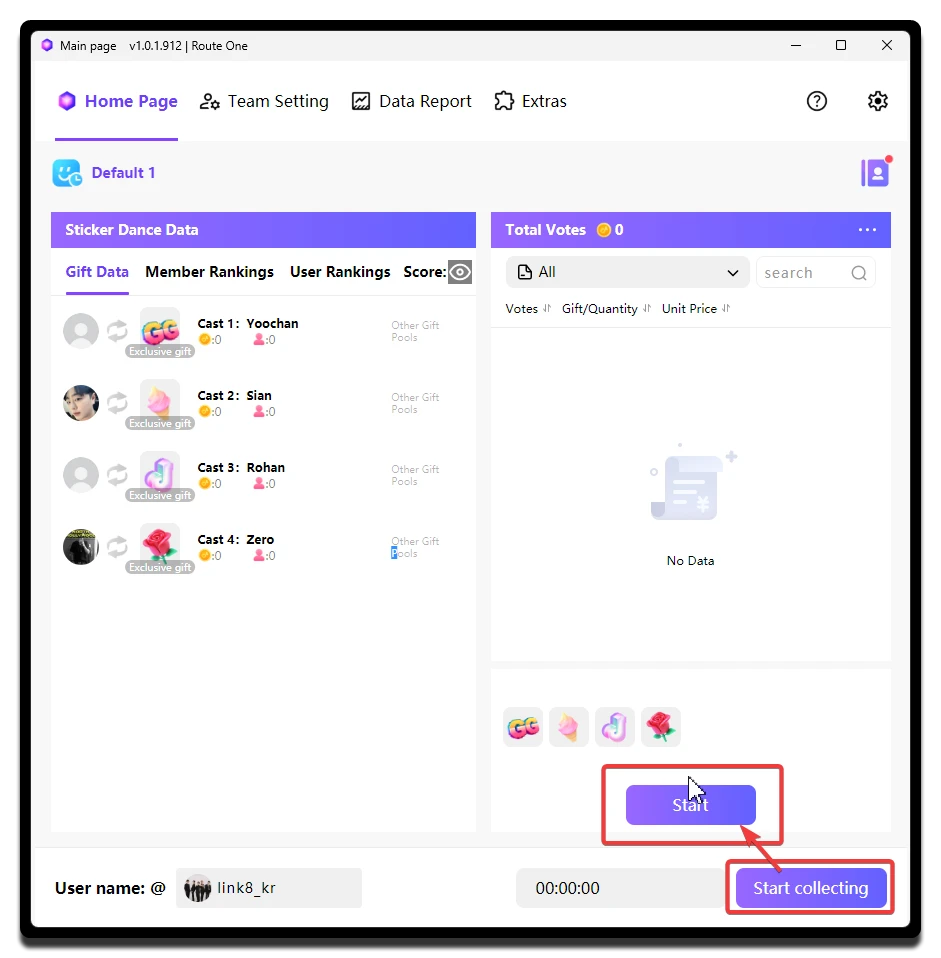
Home Page, clickStart collectingto start collection. MCAStar is now actively working. - When the cast members are ready, choose
Preset 1onHome Pageand clickStartin the lower-right corner to begin the dance.
If Collection Fails to Start
There are usually two directions to check first:
- Collection line: Confirm whether the current line matches your access environment.
- Software conflicts: Check whether system protection, antivirus software, or other security tools are interfering with collection.
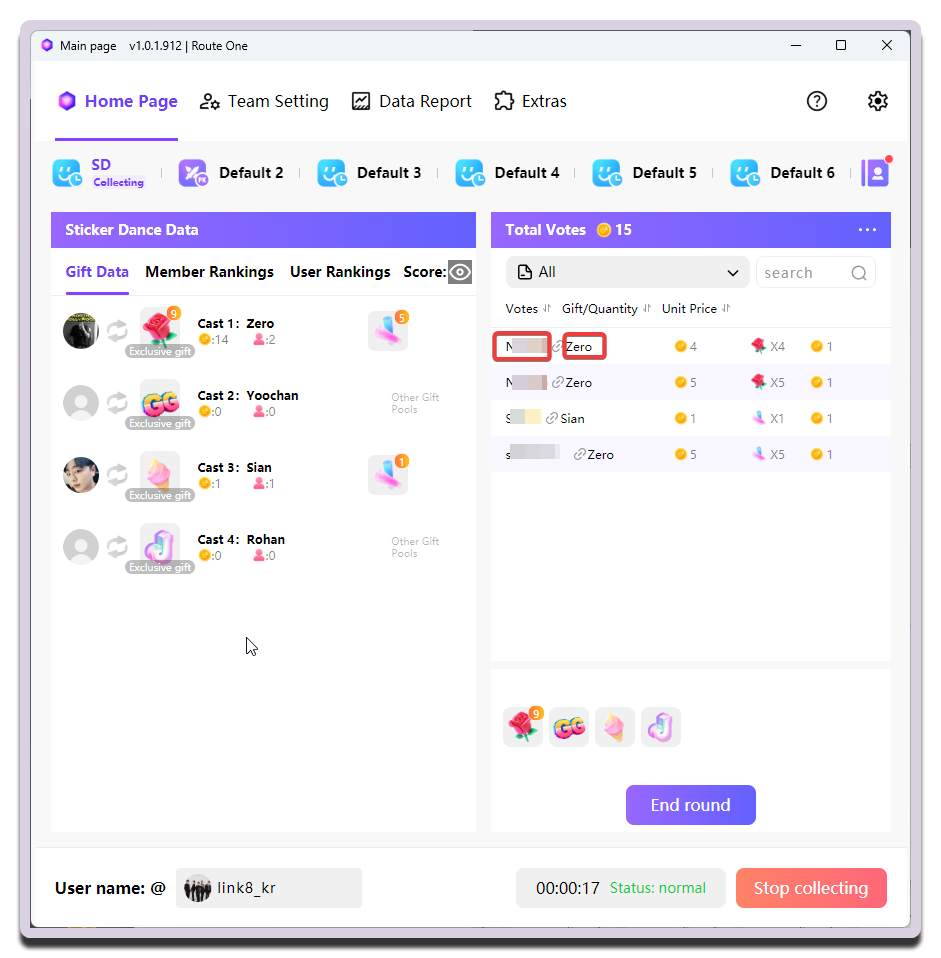
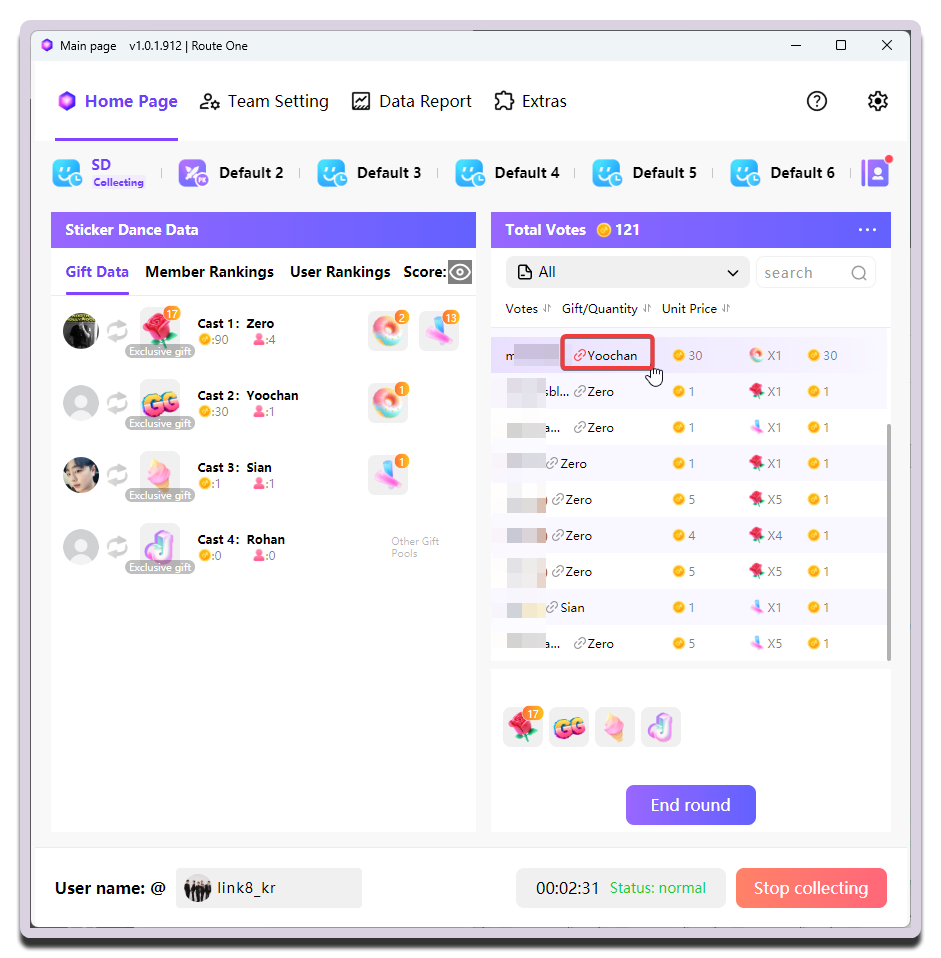
When viewers send gifts, the gift records appear on the right side of Home Page.
About Start
MCAStar startup happens in two steps. First you start collection with Start collecting. Once collection has started, you do not need to stop it unless you switch modes, and you can collect data for multiple rounds within the same mode.
After that, you start the specific mode itself with Start. The exact timing of this action is fully controlled by the Host / MC.
Collection works in MCAStar but the widget does not move in the broadcast tool
This often happens in Live Studio. If it happens, just copy the URL again and add the widget to the broadcast tool once more.
No data recorded inside MCAStar will be lost because of copying the URL again or deleting and re-adding the widget in the broadcast tool.
Gift Binding
If a viewer sends a gift that matches the Sticker Dance rules, MCAStar automatically binds it to a specific cast member as shown above.
You can also click a binding record and adjust the binding manually.
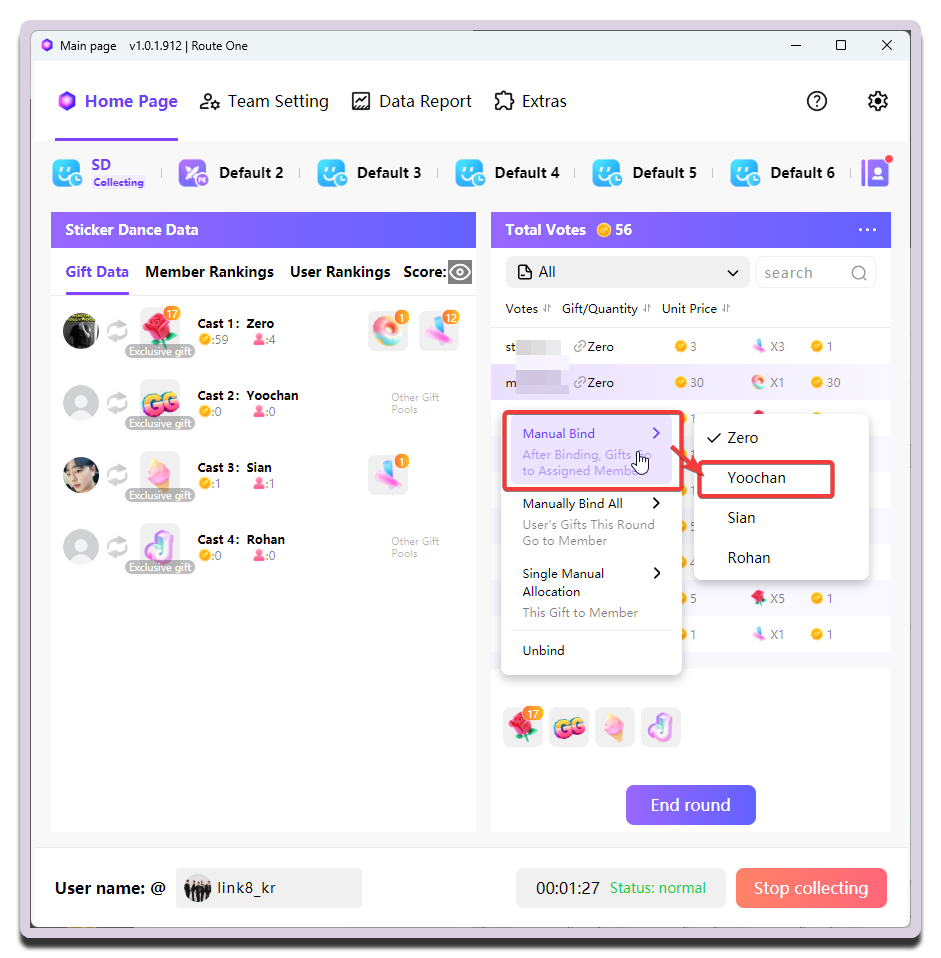
Manual Binding Options
Manual Bind: Starting from this operation, including the current one, future gifts from this viewer will be assigned to the newly selected cast member.Manually Bind All: From the start of this broadcast until the end, all gifts from this viewer will be assigned to the newly selected cast member.Single Manual Allocation: Only this single gift record is assigned manually to the selected cast member.
Bindings that have been adjusted manually are marked with red / yellow magnet icons: